

This article is way over due. It's time to clear up some of the mysteries about the Giubos, Driveshaft, and Clutch.
Caution, this page deals with a lot of grey areas of Alfa Romeo GTV6 and Milano 75 mechanicals. Everything on this page is my opinion. It's all tried and true on my cars but I could be wrong about some of this stuff.
The purpose of this page is not to re-write the factory manual, or to even provide instructions on overhauling these parts. Those subjects are already well covered in the official publications and in articles at www.alfagtv6.com
My reason for writing this is to point out some commonly missed factors when overhauling these components, as well as show you what I do to prevent Giubos from blowing with a lot of power on them. There will be four main subjects.
1. What's all this nonsense about out of balance driveshafts?
2. Why do other people have Giubos blow when I don't?
3. How can I get that like new clutch feeling without spending a lot of money?
4. What can I do to avoid synchro wear and the second gear crunch?
Why your driveshaft is vibrating even thought it's probably NOT out of balance.
The driveshaft in the GTV6/Milano is fairly unique in the automotive world. It spins at engine rpm regardless of what gear the transaxle is in because the clutch is with the transaxle at the back of the car. This does make high rpm driveshaft vibrations more noticeable. One nice factor is that it also makes driveshaft vibrations a lot easier to identify. Just rev the motor up in neutral with the car parked. If it vibrates it could very well be a problem with the driveshaft.
At this point most people will advise you that your driveshaft is out of balance. It might be, but it's very unlikely unless somebody has screwed it up. The common school of thought seems to be that the driveshafts were balanced at the factory together and that if the two shafts are taken apart they have to go back together in the same orientation. Along with this same school of thought is the opinion that all of the nuts, bolts, and washers are critical and must be put back in the same location.
I don't believe either of these two things. I think the shafts were balanced individually and the nuts, bolts, and washers don't really matter and should all be the same size. HOWEVER just to be on the safe side I do color code everything before I take it apart assuming I am starting with a vibration free shaft. I think these are myths based largely on poorly translated factory publications. It seems very unlikely that the factory would set up the driveshafts in such a critical fashion. The need to keep track of every part and make sure everything goes back together the same way is a huge hassle. The headaches that would make for dealers would be massive.
The driveshafts are balanced with weights that are welded on. I have never seen these weights come off so it's very unlikely the shafts are out of balance.
I am not basing this on theory alone. I have combined parts from different driveshafts and used all new washers of the same size and ended up with a perfectly smooth driveshaft. If your driveshaft has grossly mismatched washers it's probably because somebody else tried to balance it this way. They may have even improved it, but probably not because it was out of balance in the first place. Every driveshaft vibration I have seen has been caused by one of two things: it's either bent or out of alignment.
These two problems are very common on GTV6s. They are less common on Milanos for reasons which will become clear.
I color code everything on the driveshaft before I take it apart. It's most likely a waste of time, but I do it anyway.

Let's start with the bent driveshaft problem. This is very common on GTV6s. Here is how it happens. The GTV6 does not have a removable crossmember at the driveshaft's center support. When changing Giubos this is a problem because once the driveshaft is released from the engine, center support, and transaxle it won't come out! At this point most mechanics force it out by bending it down and pulling it out the back. This puts a huge amount of strain on the center Giubo in a direction it was never intended to flex which can lead to premature failure. IT CAN ALSO BEND THE DRIVESHAFT! The driveshaft is made from very thin metal and it can take a lot of stress from rotation, but it's not a pry bar. If used as one, you will stand a good chance of bending it. Once the driveshaft is out, the mechanic will then change the Giubos and bend it again putting it back in.
The correct way to avoid this problem is to lower the front of the transaxle by unbolting the rear crossmember, Watts linkage, rear anti-sway bar, and rear shocks (these last two are optional) then jacking up the rear of the De Dion tube. Don't forget to disconnect the speedometer sending unit and backup light switch. This will force the front of the transaxle down. Once this is done it's relatively easy to slide the driveshaft out the back. It will need to come back offset to the driver's side, and it will just barely come out, but it will come.
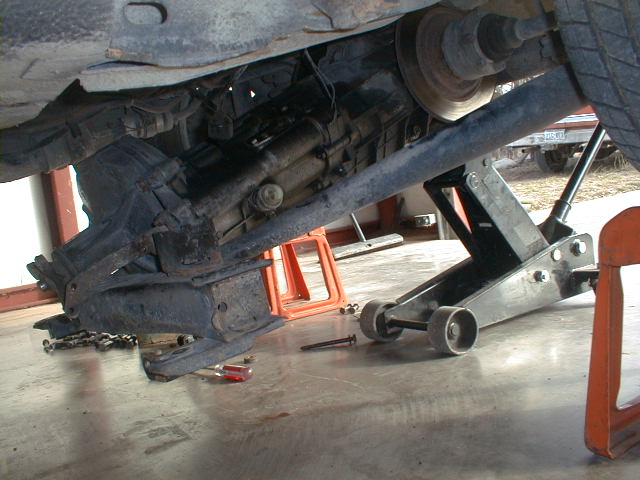
This picture shows the front of the transaxle in the lowered position. If you have a GTV6 without a removable center crossmember (that's about 95% of them) you will need to do this to get the driveshaft out without damage. This is also the position you need to get it in for clutch work.
So...that's how to avoid bending the driveshaft in the first place, but how do you know if it's bent. I suggest taking it to a driveshaft servicing facility and having them check it for straightness. The bad news is the driveshaft shop I went to said they can't straighten them. It's quite possible some driveshaft shops can. In any case, it may be easier and cheaper to get another driveshaft.
Now this next problem afflicts both GTV6s and Milanos. It's driveshaft alignment. For the purposes of this discussion I will assume your car has decent, or at least marginal motor and transmission mounts. Those things will effect alignment but as long as they are intact they should be ok.
There are two directions the shaft can be put out of alignment. First there is a fore and aft alignment. Second is the up and down alignment. Lets start with the fore-aft issue.
This one is really simple, it's in the shop manual but somehow it gets missed. The driveshaft needs to settle into a position where there is no fore or aft load on the Giubos. If it is not positioned just right it can lead to vibration and, even worse, premature Giubo failure. This is especially critical on a high-powered modified car. The Giubos are strong as long as they only have to deal with rotational force. If they are being stretched in a fore or aft direction their ability to handle a rotational load can be diminished.
Failure to set the fore and aft alignment is probably the number one cause of Giubo failure.
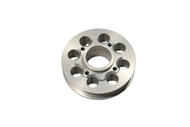
Here is a brand new Giubo next to the failed Giubo it is replacing

Setting the fore and aft alignment is easy. When installing the driveshaft put plenty of never seize on the spines at the front of the shaft. DO NOT tighten the pinch bolt. Finish everything else first and start the car, let it idle for a few minutes, then rev it up and down in neutral about 20 times. This will allow the Giubos to find their neutral point and move the driveshaft into the correct position. Now go back under the car and tighten that pinch bolt.
This is a good time to talk about that pinch bolt. If you car has a rattle in the driveline, it's probably a loose pinch bolt. What's worse is that when the cars get older the splines wear and the pinch bolt can't tighten enough to eliminate the rattle. I have two solutions for this. The first was provided by Barry H. of South Africa. He says to beat the splines on the driveshaft with a hammer to flatten them out thus making them a little wider. I haven't tried it but it makes sense to me. The second comes from my dad. He gets out the Sawzall and makes the slot wider so the pinch bolt can tighten everything more. Just about 1mm will be more than enough.
Here we can see the pinch bolt. My finger is pointing out the slot my dad enlarges when needed to eliminate driveshaft rattle. Notice this whole thing is coated in Never Seize to enable the driveshaft to slide in and out easily.

If your car has a constant driveline vibration, or one that seems to be associated with an application of power and not just rpm, it's very likely the transaxle snubber. The front of the transaxle tends to rise under power, so the factory included a snubber above the transaxle to prevent it from hitting the body. The height of the snubber is adjustable via a threaded shaft and a lock nut. It should be set so that the transaxle will only touch it during the most severe movements. It should not be touching all the time or as a result of normal driving.
Picture below is the transaxle snubber. If it's adjusted too low the transaxle will rub it sending constant vibrations into the car.

This next one kind of bothers me. It's easy enough to fix, but it shouldn't be a problem in the first place. The GTV6 and Milano use different transaxle to rear cross member mounts. The GTV6 mounts are no longer made so the parts vendors just send you a Milano mount when you order one for your GTV6. Guess what? It will fit your GTV6 but it will put your driveshaft out of alignment in the up and down plane. Specifically it will move the front of your transaxle up. This is because the Milano mount has an extra metal plate welded to its base, making the base thicker, and thus moving the transaxle up.
My screw driver is touching the plate Alfa Romeo added to the Milano transaxle mounts. If your GTV6 has these plates then your driveshaft is probably out of alignment.

Now, it would sure be nice if the vendors included a little note saying to remove these plates, but as far as I know, they don't. If you get new mounts it's best to remove the plates. If you have already installed these mounts on a GTV6 or don't want to remove the plates I have another simple solution. Simply add washers above the rear crossmember where it attaches to the body. Use washers, or a combination of washers with the same thickness as the added plate. This will move the front of the transaxle back down to the correct height. This will eliminate vibration.
Here my screwdriver is touching the washers I added above the factory spacer to move the crossmember and transaxle down. This works perfectly.

That's it! In summary if your driveshaft vibrates it's probably either bent or out of alignment. The alignment issue is critical for Giubo life, especially on a high powered car.
Cross bolting the transaxle mounts.

The transaxle is attached to the car with three mounts. The condition of these mounts effects alignment of the driveshaft. When the driveshaft is out of alignment it tends to twist the Giubos causing them to fail. The main mount is at the rear of the transaxle. When it gets old, it starts to deform allowing the transaxle to sag. Thankfully it's easy to replace and that's your only option.
The two forward mounts are equally critical, however they are more difficult to change, especially on a Milano. Worse, it's hard to see them to ascertain their condition. The result is that these mounts are often forgotten until they fail completely. The big problem here is on high powered cars as soon as they age even a little, they start to flex.
To prevent the forward transaxle mounts from flexing and eventually failing I suggest cross bolting them. This is pretty simple. Drill a hole through all three of the metal plates, shove a bolt through and put a nut on the other side. That mount will no longer flex and probably won't ever fail. There will be an increased amount of vibration felt in the car, but it's minimal. In fact, I don't even notice it. Just in case you do want to remove the bolts I suggest welding the nut to the forward side and inserting the bolt from the back. This way you can install and remove the bolts as desired. We have done this on three cars with total success. However at least one person encountered an unacceptable amount of driveline vibration with this method so there may be some unknown variable here. Use caution.
For what it's worth, I actually weld all the nuts onto the front side of the forward transaxle mounts. It makes future servicing very easy. As many of you know getting a wrench to the forward side of the transaxle mount is a pain in the butt. Welding the nut there eliminates this problem.
Clutch!
The clutch assembly for these car is pretty expensive. The good news is it lasts an incredibly long time and it's parts are very high quality. In most cases you will only NEED to replace the clutch disk or have it relined and that's inexpensive. A single plate Milano clutch can last well over 200,000 miles if driven correctly.
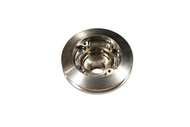
Here I am pointing out the clutch wear indicator. If that button is flush with the aluminum housing, the clutch disk is worn out. My family has put over 200,000 miles on this disk and it's only about 30% worn. These things last a really really long time! OH, and the disk was used when I bought it!

In most cases the only thing that will be worn out is the clutch disk itself. A new clutch disk is fairly inexpensive. Even the best aftermarket performance clutches are not too much. When you change the clutch disk I suggest putting a little extra time into so of the other components in the system. This won't cost you much and will result in that like new clutch feeling when you are done. Of course if your pressure plate or flywheel are damaged you will have to replace the entire unit, and that is expensive.
CAUTION, before you take the clutch housing apart mark the flywheel and pressure plate so you can put it back together the same way. These units are balanced together so they must be re-assembled the same way. Use paint stripes or a punch to mark the parts.
After I separate the housing I like to clean up the pressure plate and flywheel surfaces with a rotating brush on an electric drill. This removes any glazing and will help the new clutch disk engage smoothly.
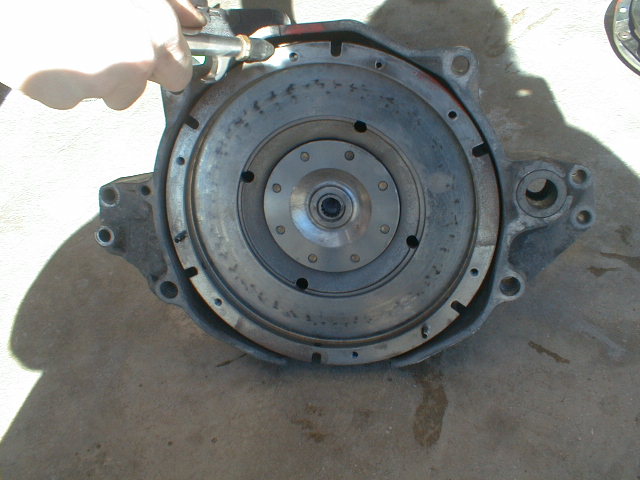
The next two pictures show the surfaces that should be cleaned with the rotating brush method. Spend some time on this step and get everything shiny.

In the photo below you can see the surface is a good as I can get it so now I blow out all the old clutch disk dust with an air compressor. It's amazing how much dust comes out.
Cleaning everything is really important. Dust and debris in the clutch housing accelerate wear and can even cause a total failure. Be sure to get everything as clean as you can.
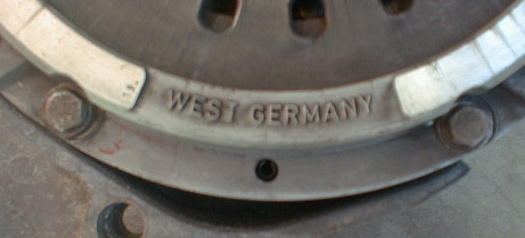
Cold War Relic! You just don't see "West Germany" anymore. If you grew up in the 80's you can remember when a lot of things were made in "West Germany".
We will need to release the throw-out bearing. If it rotates nicely replacing it or not is a judgement call. Now is an easy time to replace it but they do seem to last a really long time. If it rotates smoothly and doesn't make any bad sounds it will probably be fine for a few more years. Removing the throw out bearing is a little tricky. You will need to put in on the ground and push down on the pressure plate surfaces. This will expose a previously hidden snap ring. The ring can then be removed with snap ring pliers. Once the ring is out the whole thing sort of comes apart.
The hidden snap ring can only be exposed by pushing down on the pressure plates contact surfaces with the throw-out bearing braced against the ground or workbench. I use the ground so I can hold the thing down with my knees and use my hands on the snap-ring.

A little Lubriplate on the splines helps. Don't use much, we don't want that stuff getting onto any of the friction surfaces.

While you have the lubriplate out, put some on the needle bearings. Again, just a little. If it gets on a friction surface it must be removed before the unit can be re assembled. Use paint thinner, or even better, Acetone to remove any excess.

Pictured below is an upgrade clutch disk. This disk has proven itself able to hold 276 REAR WHEEL HORSEPOWER. Perhaps it can hold more but that's the highest powered car I have tested. If you need one give Andy at Performatek a call and please tell him you saw it here.

Lubriplate the clutch fork as shown. This will really help you pedal move smoothly and it will greatly prolong the life of the clutch fork pivot ball. Speaking of that...it's a good time to replace that pivot ball if you are unsure of it's condition.

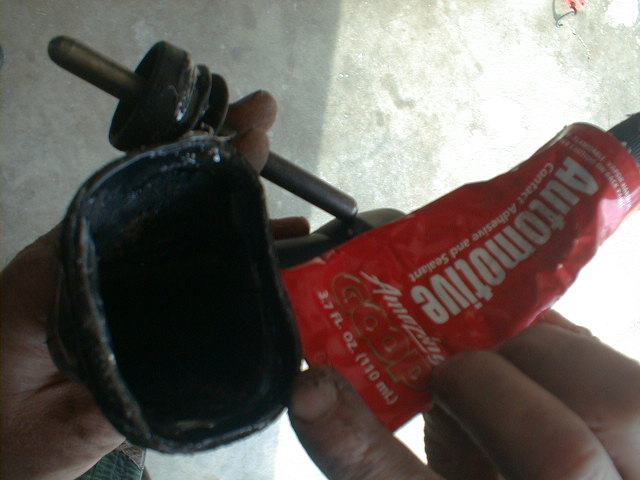
Remember I said to keep everything in there clean! The problem is the clutch boot cover lets a lot of dust in. This dust greatly shortens the life of your clutch. To prevent this seal the boot to the transaxle with Shoo Goo, or the Automotive version Automotive Goo, which as near as I can tell is exactly the same thing. I am quite certain I was the first one to point out how well Shoo Goo works for certain automotive purposes. It seems somebody listened.
Shoo Goo, or Automotive Goo should be used to seal the dust boot to the clutch housing.
This is not a shift linkage article. However I do wish to point something out. A lot of people complain about the early GTV6 shift linkage, yet most who complain have not taken the time to get under the car and do something about it. There are only two bushings involved in the linkage between the shift knob and the internal workings of the transaxle. If these bushings are worn out the linkage will be terrible. The odds are if you have not changed them, they are worn out.
One of the two bushings is directly below the shifter above the converter. The other is back at the transaxle itself. If you are not happy with your linkage change these bushings.
Back at the transaxle in the clutch housing is this bushing. It's critical for eliminating slop in the shifter. Now is a great time to replace it.

Double Clutching, or how to not wear out your synchros.
This was originally written and posted on gtv6.org which is now alfagtv6.com. Since then I still have not managed to wear out a single synchro. They seem to last nearly forever if you do the work for them by double clutching whenever possible. Save the synchros for when you really need them. For example during a critical drag race you DON'T want to double clutch on an upshift despite what Dominic says in The Fast and The Furious. This is when it's acceptable to put extra wear on the synchros.
I seem to have run into quite a few people who are not too clear on the method of double clutching, nor the reasons.
Well the reasons are simple, double clutching will greatly reduce your synchro wear, in fact if you could do it perfectly all the time it would totally eliminate all synchro wear. In many transaxle cars with worn synchros, double clutching is the only way you can downshift at speed without grinding the gears, and in some really worn out gear boxes it may be the only way you can shift period.
Before we get started lets have a basic review of what goes on in your gearbox. Inside there are two main shafts, lets call them the INPUT shaft and the OUTPUT shaft. The Input shaft spins at the same speed as the engine when the clutch is engaged (that means pedal up). The output shaft is connected solidly to the wheels via some other gears, half shafts, etc. so it spins at what we can call road speed. Get it so far? Input shaft spins at engine speed, output shaft at road speed.
Now when your car is in neutral these two shafts are not connected which is why you can rev the engine up in neutral with the clutch engaged and the car does not go anywhere. In order to make the car move we need to connect these two shafts together, we do that with one of the gears. Lets do that with first gear in ohh, say an 85 GTV6. With the car at a stop, first gear selected and the clutch DISengaged (pedal down) the shafts are connected but not turning. Remember they can't be turning because the output shaft spins at road speed and the car is stopped. The input shaft is not connected to the engine because the clutch is disengaged.
Now, we will let the clutch out and the car will start moving because the clutch by definition engages and CONNECTS the engine to the Input shaft of the transaxle (via the driveshaft of course. Now the Input shaft is turning at engine RPM and the Output shaft is also turning but a whole lot slower due to the 3.5:1 first gear. That means that when in first the input shaft spins 3.5 times for every one time the output shaft spins.
Now the fun part. We rev our already warmed up car up to 6300 RPM in first and shift into second (just a normal shift, we are not double clutching yet). Now what happens? As we all know this will result in a big drop in engine RPM. IN fact it will drop to about 3600 in this particular year GTV6. However the output shaft continues to spin at the about the same speed because road speed has not changed much during the shift. However what is the input shaft doing? Well, it's spinning a whole lot slower, it just dropped from 6300 rpm to 3600 rpm. So, what caused it to slow down while the clutch was in during the shift? If you guessed SYNCHROs your right! The synchro is simply a metal ring that uses friction, like a break to slow down the input shaft to match the speed of the output shaft so the two shafts can be connected by the gear. Every time you shift up a gear the synchro slows the input shaft enabling it to be reconnected to the output shaft. If the synchro is worn and it can't get the shafts to the same speed you will hear that horrible crunch and grinding sound.
Now the more the synchro has to slow down the input shaft the harder its job is. A shift at max RPM causes a much bigger RPM change then a shift into second at 3000 rpm. That means that the synchro will have a much easier time dealing with a 3000 RPM shift then a redline shift. So your car is much less likely to grind with a low RPM shift and will have much less wear on the synchros. Of course it's not fun to drive around at low RPM all the time so we need another way to reduce the load on the synchros, and I am getting to that.
Now lets consider a downshift. A downshift is just the opposite of an upshift meaning engine RPM and Input shaft speed will increase. That means the synchro will need to speed up the input shaft which is a whole lot harder then slowing it down on an upshift. On an up shift the input shaft slows down on its own and the synchro just helps it along but on a down shift the synchro has to speed that shaft up a couple thousand RPM and that's very hard on it. Again a key to minimizing the wear is to shift at the lowest speed possible and only go down one gear at a time. A shift from 5th into second at 40 mph will require the synchro to speed that shaft up a whole lot more then a shift from fourth to third at twenty for example. In fact even if your synchros are new they may give trouble in that 5th to second scenario and won't last long if you do that.
Understand that that was just a very basic non tech description of how the transaxle works but should give enough info to understand double clutching.
Double clutching is a method of reducing the load on the synchros by matching the speed of the input shaft to the output shaft manually during shifts. During an upshift it will be necessary to manually slow down the input shaft and during a down shift you will need to speed it up.
How do we do this? It's easy, at least in theory although it will take a little practice. First of all lets sit in the car, start the engine and rev the motor with the clutch engaged (pedal up) and the car in neutral. Right now you are speeding up and slowing down the input shaft. Whatever speed the engine is spinning, that's the speed of the input shaft. As soon as you depress the clutch pedal the input shaft will start to slow to a stop since it is no longer connected to the engine. After you depress the pedal wait a moment for the shaft to slow down to make things easier on the first gear synchro which will need to stop the input shaft. Now lets get the car rolling by letting the clutch out and run the car up to max RPM in first. Now we are going to DOUBLE CLUTCH into second gear. First let off of the accelerator press the clutch pedal in and move the shifter to neutral. Let the clutch pedal out and wait a moment. Now engine RPM and consequently Input shaft RPM will begin to drop. That's exactly what we need. In an 85 GTV6 we know that it will need to drop to about 3500 RPM to be equal to the output shaft, in a Milano 2.5 it's closer to 4000rpm due to its closer gear spacing. Once the engine is approaching to desired rpm (it's better to do this too early then too late) press in the clutch pedal and select second gear. If you time it right the synchro will only have to slow down the input shaft a couple hundred RPM instead of the 3500 it needs to slow during a normal shift. Even the worst synchro can handle this job so you can understand why this method reduces wear and enables shifting with really worn synchros.
Practice upshifting this way and soon it will be second nature and you will be able to do it really fast with no wear or damage to your transaxle. You will soon learn just how long you have to pause with the clutch out in neutral for the RPM to drop the right amount. It's a little different in each gear and for each year but basically it's about about a two second pause for the first to second shift and about one second in all the others except fifth. Shifting into fifth the RPM drop is so minor that double clutching is not needed but if you want too, make the pause as short as you can and it will be about right.
OK, now the hard part the double clutching down shift! This is what separates the amateurs from the experts.
Really it's not that bad. Lets start with a fifth to third shift at around 60 mph. This is the typical passing scenario. First of all the car at 60 will be at about 3000 rpm in fifth. In third gear it will be turning around 4000 rpm at 60, that means we will need a 1000 rpm INCREASE.
We start out by pushing in the clutch pedal, putting the car in neutral and letting the pedal out. Now we can speed up the input shaft to 4000 RPM with the accelerator pedal. Once it is at the required RPM or close enough push the clutch pedal in and select third gear, then let the pedal back out. This really takes a lot of practice but once you get it you can downshift to second or third from and other gear smoothly with no gear crunching or grinding. When practicing this don't get too hung up trying to look at the the tach and match rpm, you just need to blip the throttle to an RPM higher than needed and let it settle into the desired range and then select the gear before the input shaft slows down too much.
Good luck and lets preserve those synchros.